I just finished up the last assignment for Stanford University's CS193P course, iOS Application Development (conveniently hosted as a YouTube playlist), and decided to wrap back around to a devilish challenge from Assignment 3.
In the first half of the course, you implement increasingly sophisticated versions of the card game Set. Assignment 3 focuses on rendering and laying out the cards programmatically. The intent is to exercise your understanding of views, the view hierarchy, and how drawing works.
In this post I'll focus on the most interesting of the assignment's listed requirements: "You must draw [the cards] using UIBezierPath and/or CoreGraphics functions. You may not use attributed strings nor UIImages to draw your cards."
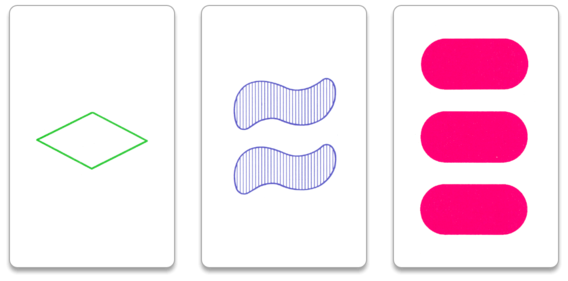
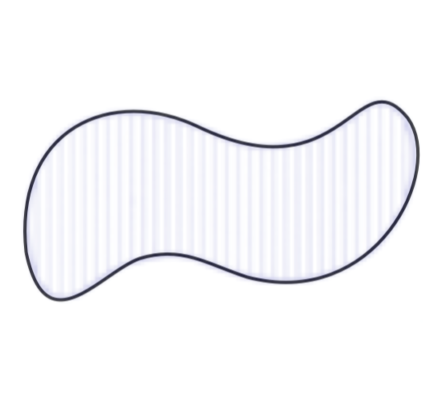
There are three types of shapes that adorn Set cards: diamond, squiggle, and stadium, as seen in the image below. Likewise, UIBezierPath offers three building blocks: straight lines, circular arcs, and Bézier curves. The diamond can be drawn using lines, the stadium both lines and circles, but the squiggle requires Bézier curves.
To draw the squiggle, I needed to answer the following questions:
Thankfully, the internet abounds with helpful info on Bézier curves. Here are a couple resources I found particularly useful:
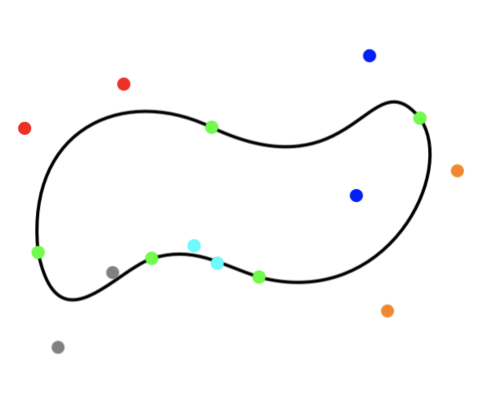
I used cubic Bézier curves as my weapon of choice, via UIBezierPath's addCurve(to endPoint: CGPoint, controlPoint1: CGPoint, controlPoint2: CGPoint). Judging by the look of the squiggle, they seemed to be an obvious fit. I ended up using five curves to construct the squiggle, but I think elegant solutions could be done with more or even fewer.
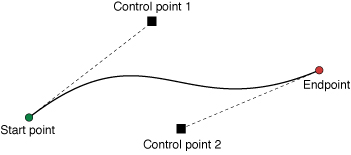
But what about the start/end/control points? With five curves, that's fifteen points! Each needed to be picked just right to produce a well-formed squiggle.
What does picking the right points look like? Here's an example from sample code by Apple where a checkmark is built from a Bézier curve (note the code uses CoreGraphics functions instead of UIBezierPath):
CGContextBeginPath(context);
CGContextMoveToPoint(context, P(0.304f), P(0.425f));
CGContextAddLineToPoint(context, P(0.396f), P(0.361f));
CGContextAddCurveToPoint(context,
                    P(0.396f), P(0.361f),
                    P(0.453f), P(0.392f),
                    P(0.5f), P(0.511f));
CGContextAddCurveToPoint(context,
                    P(0.703f), P(0.181f),
                    P(0.988f), P(0.015f),
                    P(0.988f), P(0.015f));
CGContextAddLineToPoint(context, P(0.998f), P(0.044f));
CGContextAddCurveToPoint(context,
                    P(0.998f), P(0.044f),
                    P(0.769f), P(0.212f),
                    P(0.558f), P(0.605f));
CGContextAddLineToPoint(context, P(0.458f), P(0.681f));
CGContextAddCurveToPoint(context,
                    P(0.365f), P(0.451f),
                    P(0.304f), P(0.425f),
                    P(0.302f), P(0.425f));
CGContextClosePath(context);
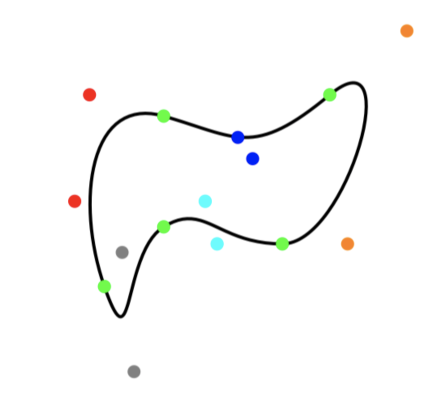
Quite a bit to manage! As you might expect, it's tough to just look at the squiggle and somehow extract the points that compose it. I gave it an honest try, and after a bunch of dumb trial-and-error, managed the following:

In the ballpark, but I wanted to do better. After finishing the course, I decided to go all-in on crafting the perfect squiggle.
Ultimately, I built a simple graphics editor inside the Assignment 3 codebase to manipulate the curves with touch-and-drag. The editing experience provided instant, visual feedback for how the positions of the start/end/control points impacted the resulting curve.
The final squiggle:
The editor has just a few features:
If you are working on Assignment 3, programming the editor requires nothing more than the tools already in your toolbox: custom views integrated with gestures.
I should mention that there are apps, such as PaintCode, whose entire purpose is taking vector drawings and exporting them as UIBezierPath code to paste into your project. Surely this is what any reasonable person would do in the real world. But I wanted to follow the spirit of the assignment and develop the squiggle entirely on my own. After all, the reason I was doing this assignment in the first place was to build iOS development muscle.
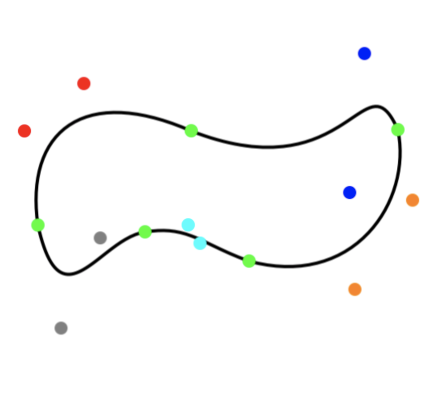
With the editor in place, I was able to develop a pretty competent squiggle:
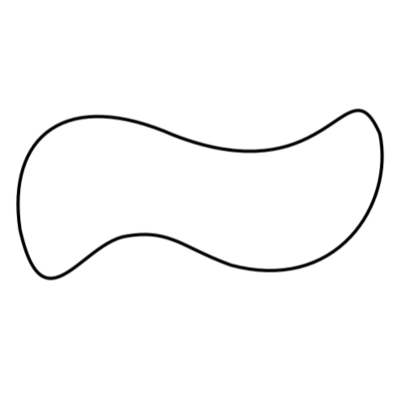
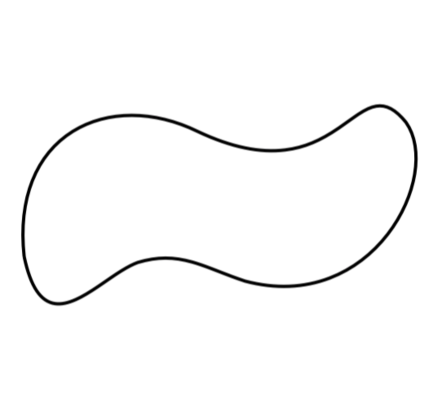
But why not go even further? I considered Wikipedia's squiggle (from the top of this post) the canonical version. I needed to match it exactly.
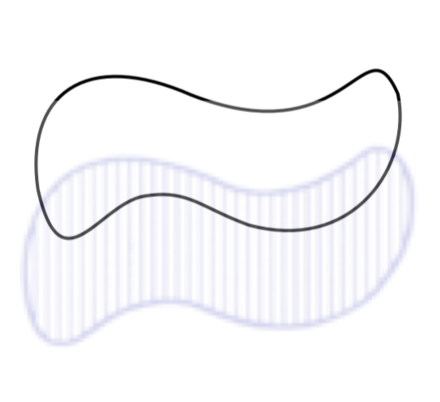
Artistic skill be damned. With a quick UIImage at 30% opacity, I was able to trace my way to the finish line.
I stumbled upon a great tip early on when researching more about Bézier curves (from Mozilla):
You can string together several Bezier curves to create extended, smooth shapes. Often, the control point on one side of a point will be a reflection of the control point used on the other side to keep the slope constant.
This tip saved me a ton of time by avoiding "wrinkles" at the points where two curves link together.